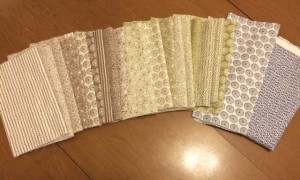
If you are a beginner quilter you are likely therefore a beginner to the fabric cutting process as well. This step of the quilting process was the most nerve wrecking part for me simply because I didn’t want to mess up my measurements and waste money on buying more fabric. Another reason this part was intimidating was because I would have to use the rotary cutter. A rotary cutter is like a pizza slicer except it has a much sharper blade. You will use a rotary cutter to cut your fabric instead of using regular scissors. I took my time when cutting the fabric because I didn’t want to tear the fabric, messing the edges up. So here is a break down of how I cut my fabric for my quilt.
First here is what you will need:
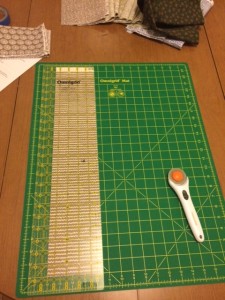
- Rotary cutter, preferably a brand new one because it will be super sharp. Many quilters fail to keep good blades in their cutters, which makes it difficult to get a clean cut. A good brand is Fiskars.
- A sturdy cutting mat. We recommend one that is big preferably 18″ x 24″. The Olfa Gridded Cutting Mat is a good option and is what I used to cut my fabric on.
- A long ruler to measure the fabric. A good rule type is the Omnigrid.
The first step is to practice. I practiced cutting with leftover scrap fabric before I started cutting into the fabric purchased for my quilt. With the scrap fabric placed on the cutting mat I started making cuts into the fabric sliding the rotary cutter away from me while holding the fabric in place with the ruler with one hand and the other hand moving the rotary cutter. I wanted to make sure that I felt comfortable holding the rotary cutter while applying pressure before moving to my quilt fabric. It’s important to mention that quilting fabric has a thread count which contains so many threads per inch. This is why it is important to have proper cutting tools and skills so that your pieces are more concise and accurate.
Once I felt comfortable I moved on to my fabric. Now I had to focus on squaring up and measuring the fabric before cutting it. For measurements I needed to cut (1) 4 1/2″ strip from each tan and green fabric. The fabric is folded, but the full width is between 40 and 44″. So my strips will be approximately 44″ x 4 1/2″.
First square up your fabric. Fold the fabric along its length with the selvages (the rough edges) together and make sure that the fold is straight. Place the ruler on top of the fabric as shown in the image below. Use the ruler to measure 4 1/2 and cut each side. Then do this for all the green and tan fabric. Make sure to recheck your measurements, the more exact they are the better.
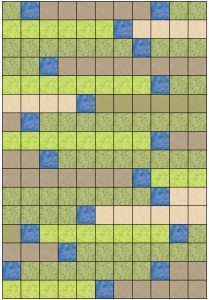
Now with the two blue fabrics that I chose I will cut (2) 4 1/2″ strips. From those strips, I needed to square up one of the 4 1/2″ ends on each strip then cut (18) 4 1/2″ squares. You will then have 18 blue squares that will be placed in between the green and tan strips as shown in the image below. Make sure to save the leftover blue fabric so you can use it as a border for the quilt later on. Also save your fabric from the tan and green so that you can use it for future quilts.
I hope you enjoyed this blog piece on how to cut fabric for a simple strip quilt pattern. Stay tuned for the next blog piece on how I stitched the fabric together to make my quilt as well as how to press your seams by ironing them.
Live Well. Quilt Well.


