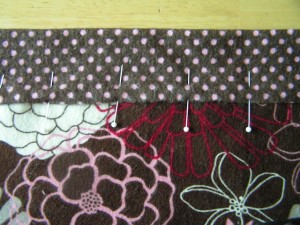
The self-binding method also called invisible stitching is a simple and easy process of binding your quilt. You simply sew on the inside of the folds so the stitching is on the inside making it practically invisible. If you are making a quilt bigger than a queen size bed you should refrain from using the self-binding method because it tends to make the quilt look more wonky. Instead this method is great for smaller quilts. This method is always great for sewing together stuffed toys and cushions. Although the self-binding method is known as an easy process there are key points and tips to mention that will help you while using this method.
Step # 1
Prepare your quilt top as usual. Then cut the backing making it wider than the top of the quilt and the batting on all four sides. Most recommend making it 3″ / 7.5 cm wider.
Step # 2
Next pin or baste the quilt sandwich (quilt top, batting and backing) and use your spray basting to make sure all three layers are stuck together well.
Step # 3
Then start at the middle of one side and fold the excess backing fabric towards the edge of the quilt making the two edges meet. Then fold it again creating a nice firm edge that overlaps the quilt top. Fold along all four edges and pin everything down neatly.
Step #4
When you get to the corners you may need to trim off a bit of the quilt top and batting in the seam allowance to reduce bulk when bringing the backing to the front. Now here is the tricky part. Simultaneously fold the sides towards the corner and decide which side will be on top then tuck the lower one under. If there is extra fabric hanging outside of the corner simply cut it or tuck it in, which ever you prefer.
Step # 5
Then take the time to baste everything to help make the sewing of the binding much easier to complete and help give it a nice finished look. Next, sew the binding by inserting your needle under the binding making the thread hidden from view. While doing this grab the quilt top and punch the needle down and through the fold of the edge. Pull the thread now through and take a small stitch parallel with the folded edge. It is easier if you start sewing along one side of the quilt and not the corner.
Step #6
Continue making a similar stitch along the folded edge and remain stitching like this switching the stitches between the top and the edging. Next when you get to the corners push the needle through the inside of the layers of the corner fold so that it is exiting right in the corner. Then, make the same alternating stitching to sew down the edge of the corner. A decorative stitch could also be used in this technique.
Once you are done working your way around the quilt edges, remove the basting stitches and admire your great work! Got any great tips or suggestions to this method? Share with us on Quilter’s Thread Mobile App.
Live Well. Quilt Well.

